Part 1 - Intro

Video Streaming
Part 1 – Intro
So streaming video is content sent in compressed form over the internet and displayed by the viewer in real time. A few years ago you had to explain the difference between downloading a file and watching it live, but pretty much nowadays everybody knows what that is. We all watch YouTube or have some sort of streaming service that we’re used to. This is a ubiquitous technology for all churches these days.
There are three phases to video streaming. Video acquisition, recording, encoding and post production and streaming delivery. So what that means is acquisition means we’re acquiring images, we’re acquiring graphics, we’re acquiring things that we’re going to actually deliver. So, that’s my content.
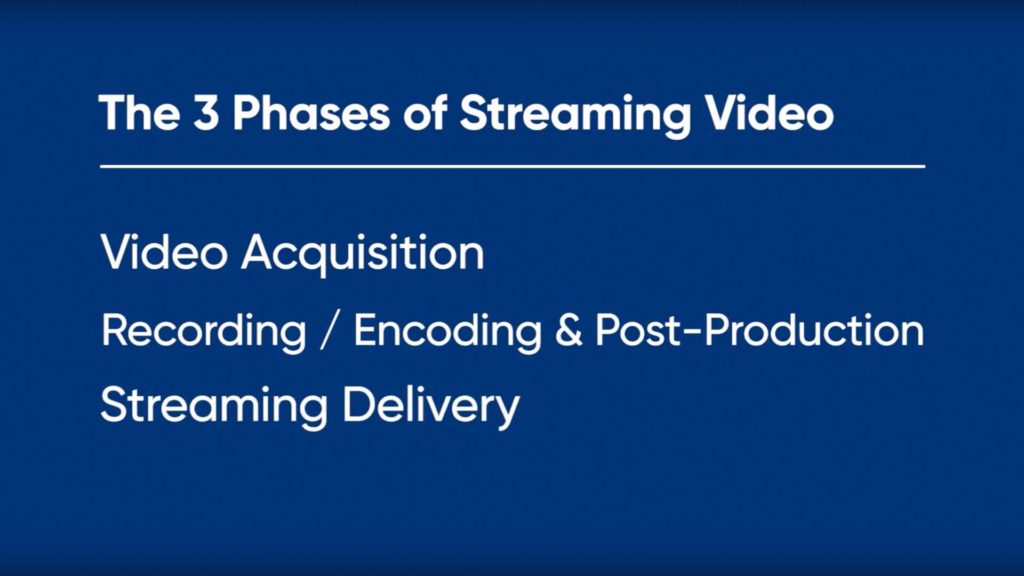
Now recording, encoding and post production is what do I do with that content once I’m starting to get it. And then the third part of this is streaming delivery. How do I get it out to where I want to send it to? Those are the three phases, you have to address all parts of those if you want to be successful with streaming.
Part 2 - Cameras + Sensors

Video Streaming
Part 2 – Cameras + Sensors
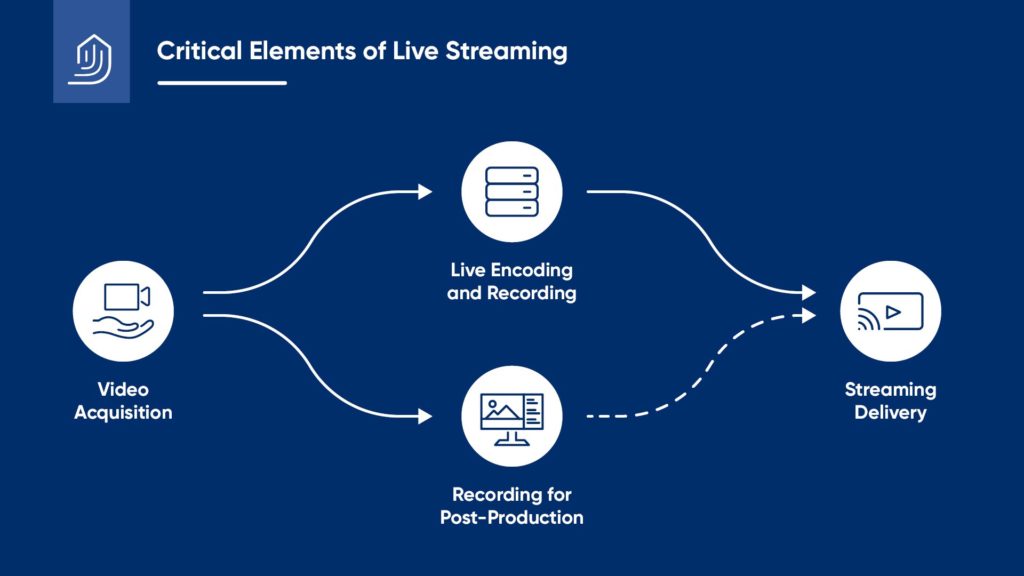
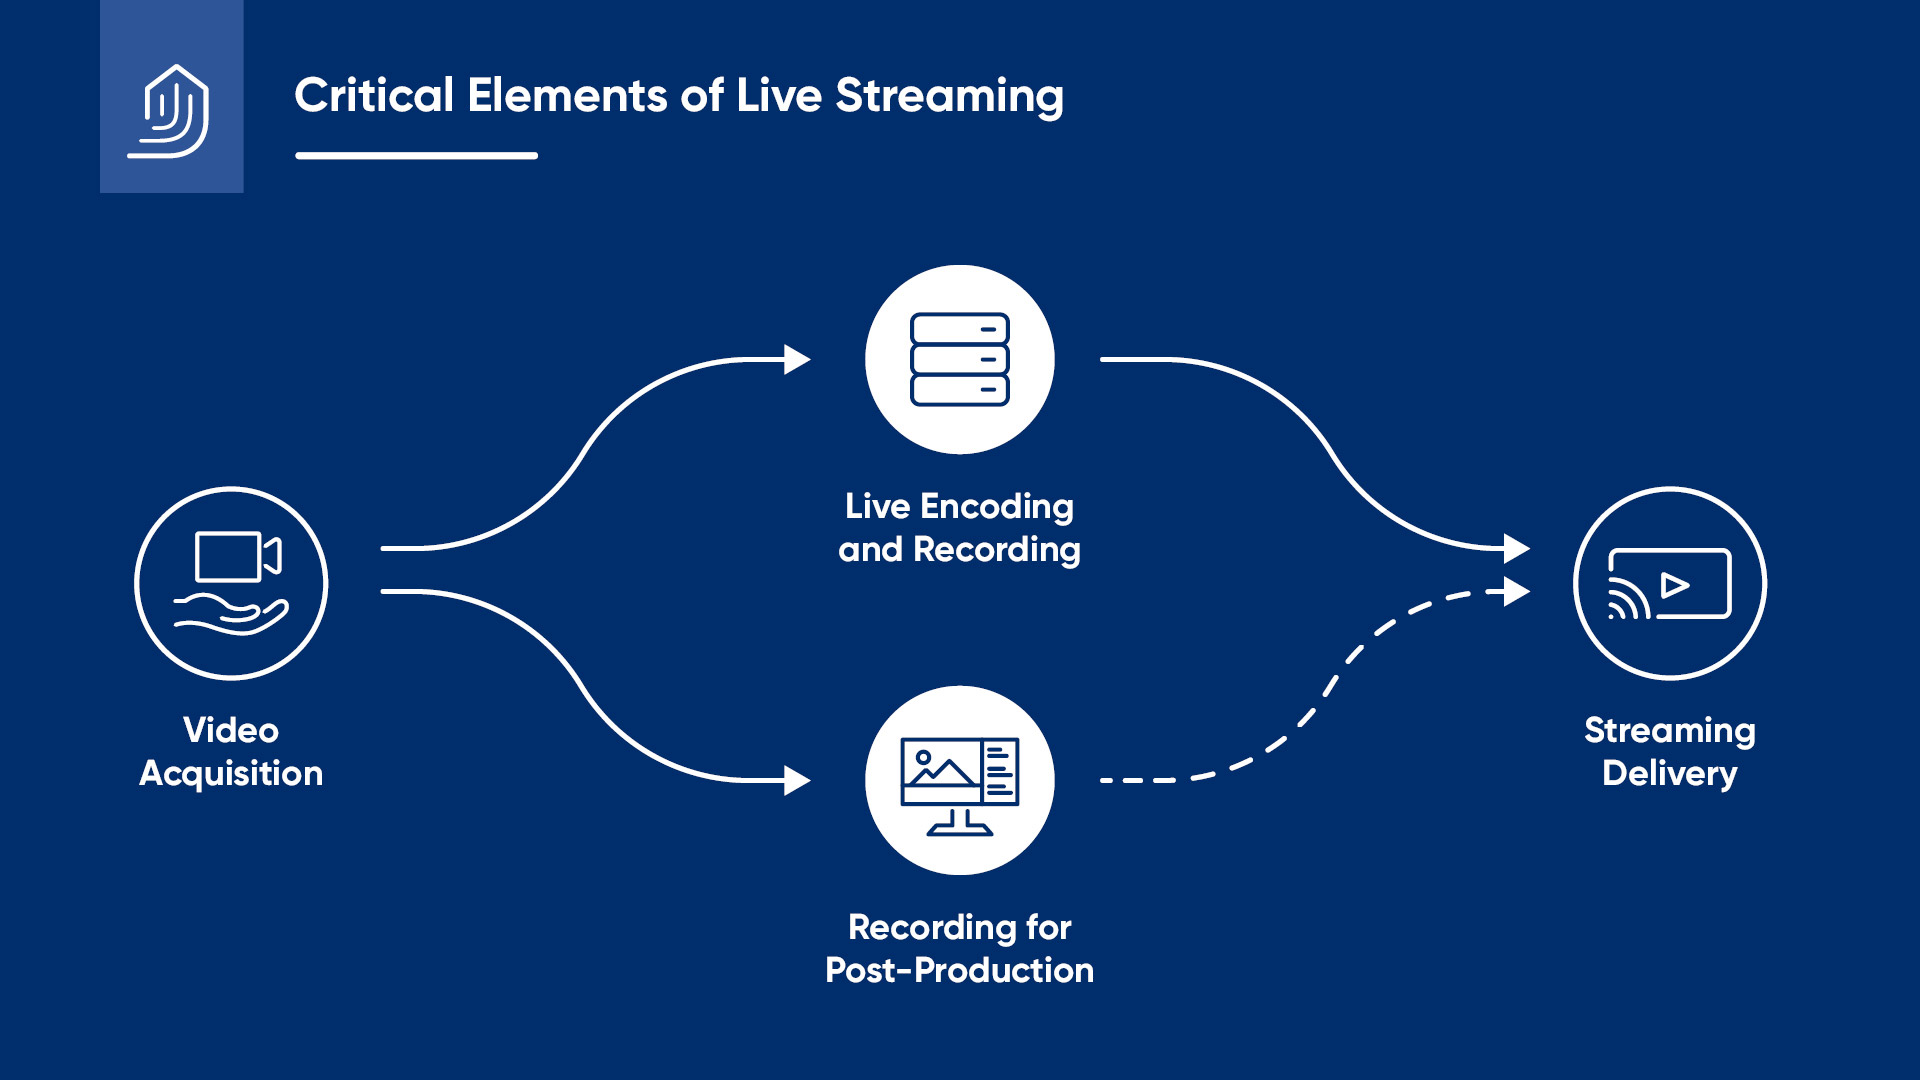
So if we look here, we’ve got video acquisition, live encoding and recording, recording for post production and then your file upload. So this is a studio and then from the studio I’ve got different cameras that are going to send a switched output and I can do a couple different things with that. We can actually send it live, so we can do a live stream. We can record it to a computer, we can record it to a hard drive and then we can edit it, put graphics in it, clean it up, do some other stuff, adjust our audio and then we can upload it. But in either case we have to start with the cameras. We have to start with what images am I going to capture.
So these are my keys to high quality acquisition. Number one, pretty straightforward, choose a high quality camcorder, use consistent, even lighting at the correct color temperature. If you have a lot of light with lights you bought at Home Depot and the guy on the camera looks really funny, it’s probably the lights. We laugh, but I’ve seen almost everything. You want to utilize interesting shot composition and proper set design. Some of you have probably seen some shots of a talking head with a pastor and the whole background behind him is black and the pastor looks like he’s a floating element in space. Okay, so we don’t want to go that direction.
And then the final thing that’s often overlooked is providing quality audio with your video. What a lot of churches will do is they’ll do their program audio that they’ve mixed and EQ’d for the room and they’ll send that same feed out to broadcast and they wonder why it sounds really bad when they watch it back on the internet. It’s because you need to put some headphones on and mix for what is actually not in the environment but what’s actually coming out through the signal chain. And if you don’t do that, you won’t have a good sound. Does that make sense to everybody, what we’re talking about? Good.
So here’s a really, really good rule. When it comes to producing video for streaming broadcast or archival, choosing the right cameras for your vision, environment and workflow is priority number one. And the reason we say vision, environment and work flow is because that’s different for everybody. Not everybody has the same environment. Some of you might have great lighting and you can put the cameras right there, some of you might have bad lighting and the cameras have to go far away, some of you have a lot of volunteers and you can have lots of manned cameras, some of you have a hard time getting volunteers and robotics might be a good idea.
The work flow, am I going to take it for post production, am I going to send it directly, all those things play into what’s important for you at your facility. Not everybody’s going to have the same process with that, but I’ll say this again, if you don’t start with a good image, guess what? All the rest of that doesn’t matter. So if the camera’s not capturing a good quality image, you ain’t gonna fix it. So the challenge is to choose the camera that is right for your application, at the right price, without short changing your ability to do better work in the future.
So even though you don’t have the budget to get the camera you really want, make sure you get something that’s at least going to be good enough that you can upgrade your system and add this maybe from a main camera you might put that over to a slash camera, there’s other options, but just going with the cheapest camera is not going to give you a good solution.
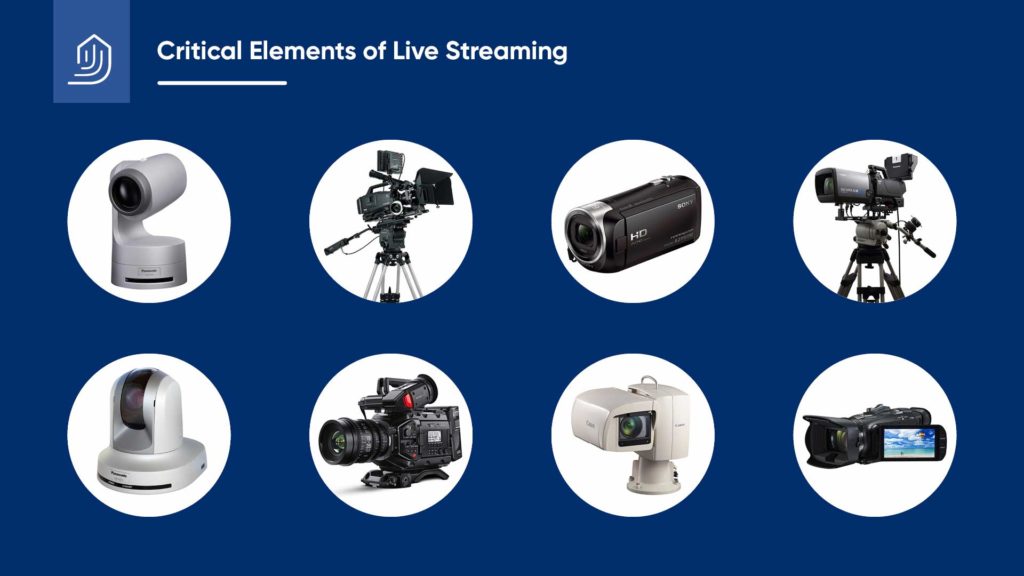
So, there are a lot of choices. So we have, upper left corner, that’s a three chip robotic camera. Down below it, that’s a single chip robotic camera. These are both Panasonics. Down here, this is a Blackmagic studio camera, this is another Sony studio camera, this is a little small Sony Handycam, this is a Canon HD Robotic camera, this is a Hitachi, well actually I think that’s another little Sony Handycam, and this is of course the Panasonic three chip, 2/3″ camera with a digi super lens on it. Every one of these cameras is an HD output camera. The image that comes out of all these cameras is wildly different depending upon the environment that you’re going to put them in.
I have a lot of people that say well gosh, we want to use this Blackmagic camera in the studio, because I’ve sene it at NABF I’ve seen it at the show, it looks great. Well, the issue with that camera is lensing. They’ve got lots of stuff for it if you want to put the camera twelve feet away, but when you want to put it fifty or sixty feet away now you gotta use all kinds of adapters and stuff and now your image gets real soft. So understanding the specifics of each camera and how it applies to your environment is absolutely critical to not wasting your money. So, are there any questions on that? Nobody’s got a question yet? Golly.
Yes, so that camera right there that’s on the upper left, that’s probably the camera that’s on me, that camera that’s in the upper right is that camera right over there with a different lens in the front. That digi super 22 is probably a thirty thousand dollar lens so unless you’re doing sports at your church, you probably don’t need that lens. Now if you’re doing sports, hey, go for that one right there.
So, here’s the kicker, and I’m going to go back to that slide real quick. These are all different cameras. Here’s the kicker. Make sure that the camera type, the output type, the recorded format and the resolution are consistent across all your cameras because if you mix different types of cameras, it’s gonna be exceedingly difficult to match them live or in post. And I’ve got plenty of churches that have gone with well see, we can afford one of these today and then now we’re going to buy a robotic over here, and we’re going to buy one of those other Handycams because somebody donated it and they wonder why every time they switch the camera the pastor’s suit changes from gray to green to brown. That’s because you have different cameras, and that’s a real pain in the neck to try to fix if not impossible.
So the camera chip size and the quantity are critical to displaying crisp images in low light settings. Each camera inside of it has a chip or chips and there are a quantity of chips, I actually took some of these highly technical slides out that explain how the camera actually works and takes images from light and creates it to an electrical environment off the back side of the chip.
But every camera will have a set of chips or a single chip of varying size. The bigger the chip, the more light that can expose on to it, the more detail you can get in the image. If you have multiple chips then you have more than one chip trying to decode the information. The reason that’s important is because the combination of chips size and number of chips is going to really indicate how well that camera’s going to perform specifically in low light.
So if you take a camera that has one chip and it’s a small chip and you put it five feet away from me and we can open the aperture of the camera all the way up so all the light’s coming into the camera, it’d probably look pretty good. You take that same camera and you put it back there forty feet away and you zoom in on me, you’ll see all kind of video noise and my shirt, image quality will look really bad, my shirt might look brown or blue because it can’t decode the color properly because there’s not enough chips and the chips are not big enough. Does that make sense to everybody?
The size of the chip, that’s something you can not overcome. If the camera is not the right camera for where you physically have to place that camera, you can’t fix that. And sometimes you say we want to go with this or this, it’s just not going to work for you. There’s no sense spending your money if you put the image out and you look at it and oh, that looks terrible. So just don’t spend the money.
So if you’ve got really good lighting, now what happens is that camera can go farther away because you’ve got good light on the subject. It’s the combination of the chips and the light and the distance that’s going to equate to how good is that image going to look. And again, the first thing we talk about is when you zoom in the aperture on the camera closes, right, to get that zoomed in spot and that lets less light into the sensor. Now if I put the camera further back and I have to zoom in, now I got a real small aperture for light to come in to start with. If I don’t have great lighting, the image quality’s going to be poor. It’s a combination of all those factors. So there’s no fundamental rule of thumb where I can put a one chip 4K sensor camera back 45 feet and I’m good, it depends on what your lighting is like too.
Part 3 - Lighting and Composition
Video Streaming
Part 3 – Lighting and Composition
So, now we’re talking about lighting. Lighting is an extremely important determinant of streaming quality. Even a single chip camera can produce great results with excellent lighting. And we talked about the distance from the camera to the subject is also critical because when you zoom in you’re going to lose light to the sensor.
So this is a picture of that same project Ronnie was talking about. You can see here that this fellow’s on the large screen. It’s a photo, but you can see there’s plenty of good broadcast lighting in the front of the stage. So if you look at what we designed here, the stage area down in front of the steps, that’s all nice, broadcast quality, even colored temperature lighting. Behind that you see all the blues and the accent lighting, it’s two different types and two different processes. One, is for a look, a mood, a feel, a light and set in scenery behind. That could be blue, it could be green tomorrow, it could be half green, half blue, but the light where the pastor and the people are going to stand is good, broadcast lighting.
Now that’s going to basically mean that we want to have what we call three point lighting. Anybody ever heard of that before? Okay, a couple people. So what we want to do is we want to have our nice front key lighting and if you put the light too high, again all of these things are specific determinants, if a light’s too high and it’s shining down on me like this, what’s going to happen to my eyes? I’m going to have shadows, I’m going to look like Mr. Raccoon, right? And some pastors have deep brows and in the mix it’s really bad when that happens. So having the light at the proper angle is going to help get that front lighting.
If all I have is front lighting and I don’t have any top or side lighting, I’m going to look like a two dimensional cartoon character when you put me on TV. So I want to have some lighting that lights behind me and on top of me so that I have depth. So that when you see it on camera, it looks like a three dimensional image. If you don’t do that then you’re just going to have a floating head type of a look with that guy standing in front of it.
And here in this application here, one of the things that you have to determine when you’re talking with your consultant about this is where is the pastor actually going to go? How many of you guys, first of all, I’m talking to pastors, how many guys here are not from churches? One, okay. Two, okay. So I’m going to use the church terminology and the church as an example because most of you guys are from church.
So we’re talking to the consultant and we’re saying okay, we want to do video streaming, the church board tells you this or your company board says we want to be able to do this. What do we need to worry about lighting wise? Well, where is the pastor going to go? That’s a question that most people forget. They think, well pastor’s going to stay right here. Well, maybe that pastor is, but what about the guy that comes in next week? Maybe he’s the guy who wants to come over here, right? We’ve had pastors that want to get all the way out here. Hey brother, how you doing? Let’s talk about this. And they wonder why we’re watching online he just disappeared. They see some fuzzy thing moving around out there and they lost the guy. It’s because he doesn’t have proper lighting where he wants to go.
We’ve done a couple churches where we had to actually light the first third of the congregation because the pastor on any given second might run down there and start talking to people. And guess what? That’s part of understanding what your particular application is. That’s why we can’t say well, you just do this and this. Everybody’s got a different application. Sometimes if the pastor just stands there, guess what, that’s easy to light. I got one area. But what if the pastor comes over here? Now is he too hot, what if he walks over here? You know, understanding that particular positioning is really critical to getting good lighting. Make sense to everybody? Pretty straightforward, right?
Now what you’re talking about behind the guy, we call that eye candy. From the camera, I don’t really care about that except it’s in the backdrop of my shot. Right? That’s creating a thematic element behind the pastor, being able to change those backdrops. Sometimes we’ll do what we call environmental projection. We’ll project on the wall or the whole stage behind the pastor with projected images. Now you can create whatever look and feel you want in the camera shot. So if you wanted to have a backdrop where the pastor was standing there and you had the walls of Jericho or a desert or a river or a cloud’s flying by with doves because he’s talking about the Spirit. Guess what? Hit the button and it’s behind the pastor.
So doing something like that gives you a lot of creative flexibility with what’s in the backdrop of the pastor. Because if you don’t think about not only the front which is my lighting, but what’s in the back of the shot, then you’ve limited yourself to half of what you can do creatively. Does that make sense? And some people put LED walls behind the pastor, that’s pretty cool too. Some of them are really bright. That causes other issues because when that wall is behind the pastor if it’s close to him, now you got an issue with your camera because you’ve got so much light coming behind him that it overwhelms the light coming from the front so that has to be taken into consideration also.
So, here’s the last part of it that we talk about. Utilize interesting shot composition, okay? No matter how good your image quality is, a single talking head or a single wide shot gets boring very quickly. Use multiple cameras, angles, fields of view to keep the viewer engaged.
I can not tell you how many times that I have seen somebody that wants to go streaming and they buy one camera and they get one fixed shot and that’s what they put on the internet for an hour. Now if you can sit there and watch that for an hour I’m going to give you five bucks because I sure can’t do it.
The other thing we see is, they’ll do one robotic camera because you can move that things around. Now that’s the way to do it, save some money there. And this is what it looks like to you when you’re watching online. Pastor’s preaching and then sister Sarah’s going to play the organ, there’s the shot. And then she’s done playing the organ it’s going to go back to pastor. Back to the pastor. And they do that for an hour. And if you aint seasick after watching that for an hour, you must have took Dramamine before he put the show on.
So have an interesting shot composition is part of the creative process. Understanding how do we want to take and communicate this event to the worldwide web, how do we want to communicate to people at home, understanding and having that concept of making it interesting, right? Making it engaging. We’re not entertaining people, but watching the static camera shot is really boring. Maybe we fade in, maybe we fade out, maybe we take a different angle, that keeps people’s interest. Putting a graphic up on the screen, that helps. But you’ve all seen that, right? How many people have seen what I’m talking about? They got one guy standing up there or they got a wide shot and the pastors that dude that’s about that tall on the stage, and the audio’s like, is he in a rap band or a heavy metal band or, they didn’t get the audio right.
So my point is all of these components, if you don’t capture the image and get a good quality start, don’t do it because you’re just going to embarrass yourself. So one of the things we hear a lot in churches is we don’t have enough volunteers, that’s a really common, not only with churches, but in schools, getting people to actually run all the gear.
So, what is happening now is that robotic camera is running off of a tracking software that follows me around which is probably one of the things that gets more churches excited than anything else that we talk about because you mean I don’t have to do anything, it just follows you? Well guess what, nobody’s touching it and it’s following me. Now the key operative word here is it’s following me. Everybody get that? So I’m going to walk over here, see how it’s following me?
Now the thing is, a robotic camera will never do what a manned camera can do, alright? A manned camera guy can see with his eye that you’re moving and instinctively lead you with the camera, he’ll do it automatically and instinctively because your brain tells you he’s moving that way, I need to lead him that way. The robotic camera will follow me. So, as I’m walking do you see the camera’s kind of following behind me. You see it? But guess what, if you want to take that shot and you want to have a shot where the pastor is in the frame and you don’t have to have some guy that’s falling asleep, that’s a great tool. But know the difference that this is going to follow me not lead me like a manned operator would do.
Now what it’s done is the camera has done a actual wire frame picture of me and it stored it in the computer and the software is picking me out off the background when I move around that software is following where I go because it’s already captured me in it’s memory bank. You can have multiple speakers and multiple pastors, different shapes and sizes of people, different zooms and the software will remember what you set up. So if you want to do a tight shot of just this face shape, or a wide shot of my body shape, you can program any of those multiple shots into that software and it will remember those.
A robotic camera still can not do what a good manned operator can do and I don’t think it ever will because the manned operator can see what’s going on, he can anticipate what’s going to happen and all the robotic camera can do is react. Albeit, it followed me pretty well, but it’s still going to always be reacting. Did I answer the question? So you gotta find the shot that you want. That could be a great fixed follow shot for out here that you can always fall back to. So if you’ve got a tight shot and pastor all the sudden jumps out of frame, you can fade into that shot. It will sort of salvage it, sort of.
Part 4 - Processing
Video Streaming
Part 4 – Processing
So there’s different types of ways video is captured and processed in the cameras and through the switchers. An interlaced signal which is the most common output out of most broadcast cameras and is mainly used with the live output because it’s bandwidth tolerant, it’s 1.85 gigabits, 1.485 gig per second. Whereas a 3G output 1080p is 3 gig per second processing. Now that all comes into the cable lengths and everything else so the common output of most cameras today still, any HD is an interlaced signal.
What that means is you get one field, the next field, one field, the next field and they come together very quickly to create a full field. Your eye never sees that, television’s been like that since the 1940’s. That fundamental technology of TV has not changed much since that day. What happens is when you take somebody with stripes on their shirt and you have that kind of an image capture and you don’t have the correct processing, what happens is as that camera’s shooting and that guy’s moving the fields, as they’re painting them and laying them back together, get out of whack and you see the shirt start doing that. Right? So what you want to do, there’s a couple ways you can get around that when you design the system. You can actually take this and convert it to a progressive scan, that fixes that, but that’s the general concept of what’s happening there.
Alright so we talked about set design, clothing, right? So here’s a couple things too and I’m just going to pitch Panasonic’s dynamic range stretch feature that’s on their cameras. And again, I don’t work for Panasonic, I don’t got a dog in the hunt, but the dynamic range stretch is an amazing feature that’s on most of those cameras over there and basically what it does is it looks at the image on the camera and at pixel group by pixel group and adjusts those on the output based on each group.
What most other cameras do is they look at the whole image and they make adjustments based on the whole image. So what the heck does that mean? Why is that important? Right? Let’s say you have a pastor who’s got really dark skin and he’s standing in front of a very lighted background, right? A lot of light behind him and a dark skinned pastor, maybe he’s got a light colored suit or he’s in front of a light background. What’s going to happen is with a traditional camera you either have to iris down because of the surrounding light and if you do that what happens is all the detail in his face is gone.
Now let’s say you got a light skinned pastor with a nice dark suit with some nice patterns on it and you’ve got him, same issue. You’ve either got him irised properly and you lose all the detail in the suit, or visa versa, so that dynamic range stretch is absolutely amazing when you have that type of situation, which always happens in churches.
The image quality that comes off of that camera, dynamic range stretch, helps with defeating some of those issues with patterns as well, because the camera’s picking up specific blocks and understanding what image it’s looking at. I haven’t seen any other cameras that do as good a job as the Panasonic. So it’s a pretty cool feature.
These guys over here, that light’s in my face, I can’t barely make you guys out. The dynamic range stretch works kind of like that. It can say block that out, focus on that. You guys are the same way. I can barely see you with those lights, but if I block that light out, now I can see you clearly. It kind of does that on a pixel block by pixel block process. Does that make sense? Really cool feature.
So here’s the other kicker, if you don’t get good capture with your video quality and your audio quality, you are stuck. I had a lady friend of mine who works at our church, she’s a professional video production person, she worked at CNN and she did a big project and they captured the audio and it was all over driven. All of it. So she called me and said hey, is there anything you guys know about [inaudible 00:23:25] that you can fix this thing because I shot the whole project and it’s all over driven. I said well, no. You gotta go back and reshoot it, sorry.
So, understanding on the front side, getting a correct, good quality image, getting your lighting and your cameras balanced, getting your audio sound properly leveled, you’ve gotta do that on the front side or you’re going to be stuck with garbage and you can’t fix it. Does that make sense to everybody? You can’t take a distorted audio and fix it, you can’t take a really bad grainy video image and make it look pretty. Even though on TV they show you these cool shows where the high tech guys can make a license plate all the sudden appear magically, that’s baloney, right? Doesn’t work that way. My kids don’t believe me, but I’m telling them.
So this is sort of a signal path. I like to do this since I do engineering sometimes, you can go to live recording or you can go to recording for post. So basically what this means is I’ve got my camera images coming out and rather than send it live, I’m going to capture it and do stuff to it and then I’m going to send it out. Does that makes sense to everybody? Okay.
So when you’re capturing it live, kind of the same thing. You could have a great image coming out of the camera, if you record it in a really compressed format and then you try to edit it and then post it and wonder why it looks bad, it’s because you didn’t have a good enough capture, the quality wasn’t good enough when you captured it. Same problem if you’ve got great images coming out of the camera and your record a bad image, you aint fixing that. So making sure you record in a high enough quality is really critical if you want to do any kind of post production.
Now it’s kind of a balancing act because here’s the deal, if you record uncompressed video off those cameras, that’s 1.485 gigabits per second, per second. Imagine how big that file would be after you recorded for an hour. It’s massive, right? So you gotta compress it, you gotta compress it some, but you gotta find the right balance between compression and not being able to use it afterwards.
So fortunately most of the products that we have back there or that we sell, you’ve got a couple industry standard settings that you can set that give you decent compression with still decent quality. And for most of the churches, that’s usually Apple’s ProRes LT. ProRes LT is a pretty high quality compression and it’s a reasonable file size. So when we record a 45 minute talking head thing, it’ll probably be about 60 gig. Now to those of you who don’t, think that’s still a big number, that’s actually pretty small for high definition video.
So that brings us to the next part of this post production thing which is I’ve got these files, what the heck am I going to do with them, right? Do I upload them to the web and let YouTube hang on to them forever, do I want to archive these, do I want to put them on a server? The back side of this is I got all these great digital files, now I have to have some place to put them.
Back in the day, I like to say that back in the day because I’m an old dude. Back in the day we would record our stuff to beta tape or some of the new digital DVC pro HD tapes that came out and we would put them on the shelf and you’d have all the sermons, you’d have all the teachings and the next thing you know after about five or six years you’ve got a giant room full of tapes and then somebody said wow, we can do that in DVDs. Then you’ve got a giant rack full of DVDs, right? Back in the day.
Now it’s all digital, now you’ve got a giant server full of stuff, right? It’s the same basic concept. You’re going to take that file, if you want to archive it you want to put it somewhere where you can pull it back later. There’s a couple parts to doing that that are really important. One is when you get 150 programs on your hard drive, how do you find the one you’re looking for? So if you don’t have the correct nomenclature there’s actually an ISO standard for writing file nomenclature that we typically would recommend. Otherwise, you never find what you’re looking for.
Pastor was talking about, oh what was he talking about. He was talking about Joshua and the battle of Jericho, when was that? Was it two years ago, three years ago, and you might spend six days trying to find that particular sermon that he wants his particular thing from. So if you don’t set up your architecture properly when you do that, guess what? You ain’t never gonna find it. So these are part of the things that you have to consider when you talk about archiving your video. When you archive stuff to the web, similarly. You gotta remember what video was that. So naming the things is really important.
Parts 5 + 6 - Coming Soon
About John
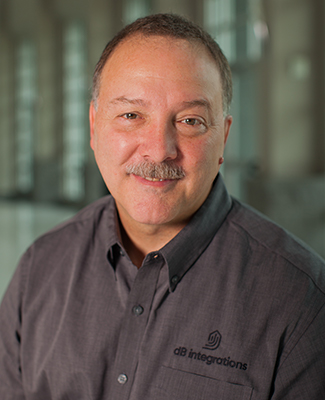
John Hogg
Sales Consultant
770 534 7620 x100
bio
John has been in the AV industry since the early ’90s initially focusing on the Broadcast Manufacturing side of the business. In 2001, he went to work as the Atlanta regional manager for a large AV integration company where he managed all aspects of sales, design, and integration for the Atlanta region.
John has a degree is mathematics/physics and holds numerous industry certifications in digital video systems design, fiber optics, reinforced sound and has been ICIA CTS certified since 2003. John loves playing and composing music and has been a worship leader/musician since the 1980s. He has been a musician with the 12Stone Church’s main campus worship team since 1999 playing keyboards, electric guitar, and bass guitar.
In addition to being a systems advisor at dB, John is the video systems design engineer and designs all of the broadcast video systems for the dB sales team. He is an audio visual systems expert with experience in all facets of design and engineering of complex AV solutions. He loves working with clients to bring their technical visions to life.
Schedule a Meeting with dB
Office
2196 Hilton Dr, Ste A
Gainesville, Georgia 30501
Contact Us
hello@dbintegrations.tech
770 534 7620

